Free Automated Paper Generator: How to Create Professional Exams in Seconds with ExamMasterAI.com

Looking for a free automated paper generator? Discover how ExamMasterAI.com lets teachers generate highly accurate, dynamic school assessments, bilingual question sheets, and answers instantly with custom styling and logos.
Introduction: The Evolution of Classroom Assessment Tools
Traditional methods of academic preparation and evaluation frequently create significant administrative pressure for primary, secondary, and upper-secondary academic professionals. Managing classroom instruction while constructing structurally robust, balanced, and original examination papers represents a persistent logistical hurdle. Writing distinct evaluation criteria, manually arranging bilingual question sheets, and organizing typographical formats require extensive time that could otherwise be utilized improving pedagogical practices or supporting student development.
To address these operational inefficiencies, automated school assessment platforms have introduced advanced structural systems that simplify exam management. Digital paper-making infrastructure changes how educational centers organize, generate, and distribute evaluation sheets. Platforms like ExamMasterAI.com offer specialized framework features designed to minimize administrative work for teachers, individual educators, and academic institutions.
Integrating automated software systems inside modern classrooms addresses a major operational bottleneck. Instead of devoting hours to writing assessments, choosing conceptual milestones, balancing difficulty settings, and proofreading formatting layouts, educators can use intelligent systems to handle these mechanical processes.
An automated evaluation framework guarantees that generated assessments follow clear structural constraints and stay clear of repeating content. This guide explores the comprehensive capabilities of the ExamMasterAI environment, demonstrating how to use its tools to build structured evaluation models, adapt multi-language layouts, adjust complex font spacings, and generate unique, randomized tests completely free of charge.
+------------------------------------------------------------------------+
|                      MANUAL EXAM PREPARATION                           |
|  [Syllabus Blueprinting] -> [Manual Choice Tracking] -> [Typing Layout] |
|  Time Spent: 3 to 5 Hours per Examination Framework                    |
+------------------------------------------------------------------------+
                                   vs
+------------------------------------------------------------------------+
|                     AUTOMATED PAPER GENERATION                         |
|  [Filter Selection] -> [Dynamic Database Extraction] -> [Print Output] |
|  Time Spent: 45 to 60 Seconds per Examination Framework                |
+------------------------------------------------------------------------+
Core Infrastructure Capabilities of ExamMasterAI
1. Unified Cloud Portal Access
The ExamMasterAI software architecture uses a multi-tier user access portal optimized for continuous data retrieval across multiple devices. The web layout includes distinct access points for three primary user roles:
- Teachers / Instructors: Equipped with specialized interfaces to filter exam questions, adjust typographical spacing, compile structural matrices, and build tailored testing materials.
- Administrators / Institution Heads: Optimized for large-scale systemic management, curricular alignment checks, and oversight of institutional evaluation metrics.
- Students / Candidates: Built to provide direct access to assigned materials, mock tests, and supplementary preparatory resources.
The interface maintains secure authentication protocols while prioritizing smooth layout navigation. This ensures users can interact with backend databases without running into confusing navigation paths.
2. Multi-Tiered Academic Grading Architecture
The internal framework supports comprehensive curricular classification, accommodating a wide range of standard academic levels. The system features predefined indexing configurations extending from Class 1 through Class 12, covering primary education frameworks, middle-school standards, and higher secondary certification blueprints.
By utilizing structured grading taxonomies, the platform ensures that extracted question banks remain aligned with the specific cognitive expectations, lexical limitations, and structural complexities of each respective grade level.
3. Integrated Subject Repositories and Linguistic Modalities
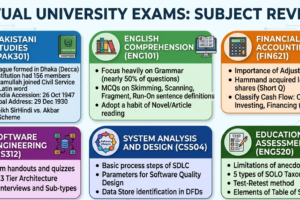
Beyond foundational layout management, the platform includes a comprehensive database of academic subject tracks, such as Computer Science, Mathematics, Islamic Studies (Islamiat), and related foundational disciplines.
A key feature of the backend database architecture is its multi-lingual rendering pipeline, which supports four distinct text styles:
- All Mediums Mode: An all-inclusive data extraction pipeline that pulls every available linguistic variation matching chosen curricular units.
- English-Only Mode: Renders technical items, instructions, and choices in standard Western typefaces.
- Urdu-Only Mode: Pulls text directly from Urdu data structures, instantly outputting the content in professional Jameel Noori Nastaliq scripts.
- English and Urdu Combined (Bilingual Mode): Alternates text displays to present questions in both languages side-by-side. This format is ideal for regional public testing, cross-cultural educational frameworks, and localized institutional examinations.
+-----------------------------------------------+
|             Linguistic Modalities             |
+-----------------------------------------------+
| 1. All Mediums (Universal Retrieval Pipeline) |
| 2. English-Only (Western Standard Typefaces)  |
| 3. Urdu-Only (Jameel Noori Nastaliq Script)   |
| 4. Bilingual Combined (Side-by-Side Render)   |
+-----------------------------------------------+
Step-by-Step Guide to Generating Your First Paper
Step 1: Navigating to the Cloud Environment
Open your modern web browser and type the target web link into the URL address field:
Plaintext
https://exammasterai.com
When the homepage finishes rendering, review the clear layout structure. Click on the button labeled Register Now or navigate directly to the secure subdomain portal:
Plaintext
https://portal.exammasterai.com
This action routes your connection through an encrypted verification layer, ensuring safe communication between your workstation and the remote database servers.
[Web Browser URL Input]
       │
       ▼
https://exammasterai.com
       │
       ▼
[Homepage Interface Loaded] -> Click "Register Now"
       │
       ▼
https://portal.exammasterai.com (Secure Subdomain Access Layer)
Step 2: Authenticating and Initializing the Instructor Dashboard
On the centralized access page, you will see a toggle selection component for three account types: Teacher, Admin, and Student. Select the Teacher portal option.
+--------------------------------------------------------+
|                 EXAM MASTER AI PORTAL                  |
+--------------------------------------------------------+
|  [ TEACHER ]          [ ADMIN ]          [ STUDENT ]   |
+--------------------------------------------------------+
| Input User Identification:                             |
| [ muddassir**121@gmail.com                          ]  |
|                                                        |
| Input Security Keyphrase:                              |
| [ **********                                        ]  |
+--------------------------------------------------------+
|               [ SIGN IN AS TEACHER ]                   |
+--------------------------------------------------------+
Enter your registered email address and password into the respective input fields. Click the button labeled Sign In As Teacher.
When your login is verified, the system routes you to the main control dashboard, revealing the automated generation layout.
Step 3: Allowing Font Rendering and Script Stabilization
When accessing the teacher control environment for the first time, wait 2 to 5 seconds before executing input commands or clicking selection filters. The platform needs a brief window to fetch external style libraries, Urdu linguistic frameworks, and complex script rendering layers.
[System Verification Confirmation]
               │
               ▼
   [Route to Main Dashboard]
               │
               ▼
 ───────────────────────────────
  CRITICAL PAUSE WINDOW REQUIRED
  Duration: 2 to 5 Seconds
 ───────────────────────────────
               │
               ├─► [Loading External Typographical Rule Sheets]
               ├─► [Initializing Nastaliq Jameel Core Fonts]
               └─► [Synchronizing Underlying Data Matrices]
               │
               ▼
   [Interface Stabilized & Safe for Parameter Filtering]
Checking that complex text components display correctly at the bottom of your screen serves as a helpful visual cue that the interface has loaded properly. Once the script renders cleanly, you can safely apply your specific evaluation filters.
Step 4: Configuring Academic Grade Filters
Locate the filter field labeled Class / Grade on the left side of the dashboard control matrix. Click the dropdown component to view the available academic levels.
Select Filter Parameters -> [ Class / Grade ]
                                  │
                                  ▼
         +--------------------------------------------------+
         | Select Grade Target Level:                       |
         +--------------------------------------------------+
         | Class 1 | Class 2 | Class 3 | Class 4  | Class 5 |
         | Class 6 | Class 7 | Class 8 | Class 9  | Class 10|
         |         |         |         | Class 11 | Class 12|
         +--------------------------------------------------+
                                  │
                                  ▼
                     [ Choosing Option: Class 9 ]
Scroll down to select Class 9 as your target level. This selection prompts the backend database to narrow its focus, filtering out irrelevant content and readying the system to display question sets suited for ninth-grade assessments.
Step 5: Isolating Core Disciplines and Subjects
Move your cursor to the adjacent dropdown component labeled Subject. Click the selection field to view the list of courses mapped to the selected ninth-grade level.
Select Course Categorization -> [ Subject Selection Field ]
                                        │
                                        ▼
               +-------------------------------------------------+
               | Predefined Course Modules (Ninth Grade Catalog):|
               +-------------------------------------------------+
               | [Computer Science]                              |
               | [Islamic Studies / Islamiat]                    |
               | [Mathematics / Analytical Geometry]             |
               +-------------------------------------------------+
                                        │
                                        ▼
                  [ Choosing Module: Islamic Studies / Islamiat ]
Select Islamic Studies (or Islamiat) from the available catalog options. The system updates instantly, preparing the corresponding religious studies question banks for query processing.
Step 6: Choosing Linguistic Filters and Medium Formats
Navigate to the dropdown component labeled Medium to set your language configuration. The system adjusts its rendering pipeline based on your choice.
Select Presentation Layout -> [ Medium Selection Dropdown ]
                                        │
                                        ▼
               +-------------------------------------------------+
               | System Rendering Methods Available:             |
               +-------------------------------------------------+
               | [All Mediums Mode]                              |
               | [English-Only Mode]                             |
               | [Urdu-Only Mode]                                |
               | [English and Urdu Combined (Bilingual Mode)]    |
               +-------------------------------------------------+
                                        │
                                        ▼
                        [ Target Option Chosen: Urdu ]
For this layout example, select the Urdu medium filter. The system realigns the question previews below, updating them to display exclusively in clean Urdu text formats.
Step 7: Refining Chapter Bounds and Curricular Subsections
To refine your assessment coverage, locate the dropdown filter labeled Chapter / Unit. This tool helps you target specific portions of the curriculum rather than pulling questions from the entire textbook database.
Isolate Curricular Bounds -> [ Chapter / Unit ]
                                    │
                                    ▼
       +----------------------------------------------------------+
       | Select Curricular Scope Options:                         |
       +----------------------------------------------------------+
       | [Full Chapter Evaluation Framework]                      |
       | [Unit 1 Specialized Curricular Subsection]               |
       | [Unit 2 Specialized Curricular Subsection]               |
       +----------------------------------------------------------+
                                    │
                                    ▼
                    [ Target Segment Chosen: Unit 1 ]
Select Unit 1 to focus your exam on the opening instructional module of the textbook. Next, locate the adjacent dropdown component labeled Half to segment the chapter content even further.
Isolate Subsection Segmentation -> [ Half Chapter Options Filter ]
                                              │
                                              ▼
                     +-----------------------------------------------+
                     | Select Chapter Division Parameter:            |
                     +-----------------------------------------------+
                     | [Full Chapter Integration Strategy]           |
                     | [First Half Curricular Content Segment]       |
                     | [Second Half Curricular Content Segment]      |
                     +-----------------------------------------------+
                                              │
                                              ▼
                     [ Target Division Strategy: First Half ]
Select First Half to narrow the system’s focus down to the initial sections of Unit 1. This prevents the question builder from pulling content from later parts of the chapter that haven’t been taught yet.
Step 8: Setting Custom Syllabus Ranges (Optional)
If your exam parameters require a customized structure that spans across multiple standard chapters, use the Syllabus Range tool to build a custom framework.
Activate Structural Range -> [ Syllabus Range Customization Tool ]
                                        │
                                        ▼
             +----------------------------------------------------+
             | Predefined Chronological Terms:                    |
             +----------------------------------------------------+
             | [First Term Range Selection (Custom Chapters)]     |
             | [Mid-Term Range Selection (Custom Middle-Tier)]    |
             | [Final Term Integration Strategy (Complete Book)]  |
             +----------------------------------------------------+
                                        │
                                        ▼
               [ Application Choice: Stay with Default Filters ]
Choosing one of these predefined terms updates the From and To selection fields, allowing you to define a multi-chapter testing scope. For this guide, leave this parameter at its default setting to maintain our focus on the first half of Unit 1.
Step 9: Defining Examination Volumes and Question Counts
Next, configure the quantitative balance of your exam by setting your desired question counts across the platform’s three core question modules.
Input Structural Balancing Metrics:
========================================================================
[ MCQ Count Filter Field ] --------► Enter Value: [ 10 ] Objective Items
[ Short QS Target Field  ] --------► Enter Value: [  6 ] Short Explanations
[ Long QS Option Field   ] --------► Enter Value: [  1 ] Complex Essay Item
========================================================================
- Locate the input box labeled MCQ Count and set the value to 10. This instructs the platform to generate ten distinct multiple-choice questions.
- Move to the field labeled Short QS and set the value to 6 to include six short-answer questions.
- Find the input box labeled Long QS and set the value to 1 to add a comprehensive essay question to the end of the exam.
Step 10: Launching the Automated Question Pipeline
Once you have verified all your filter configurations, locate the bright action button labeled Magic Generate on the right side of the parameter panel.
      [ Verify Layout Metrics & Filter Rules ]
                         │
                         ▼
             Execute Generation Pipeline
                         │
                         ▼
               +------------------+
               |  MAGIC GENERATE  |  ◄── Click This Component
               +------------------+
                         │
                         ▼
        [ System Begins Automated Generation ]
Clicking this button starts the automated compilation engine. The backend system begins searching the database for questions that match your exact parameters, getting ready to assemble your customized test sheet.
Processing and Verification Engine Analytics
When you initiate the automated generation process, the platform displays an overlay notification window that tracks the compilation progress. A countdown clock runs for about 10 seconds while the system processes your request.
+-----------------------------------------------------------------+
|                       COMPILATION TRACKING                      |
+-----------------------------------------------------------------+
|  Processing selected question matrices... Please stand by.     |
|                                                                 |
|  Current Operational Status: Analyzing Curricular Blueprint     |
|                                                                 |
|                       [ 9 Seconds Remaining ]                   |
|                                                                 |
|  Notice: The platform is organizing your exam layout.           |
|  Please do not close this window or refresh your browser.       |
+-----------------------------------------------------------------+
During this pause window, the platform carries out several essential background operations:
                  [ START COMPILATION PROCESS ]
                                │
                                ▼
    [ Step 1: Filter Evaluation & Dynamic Query Formulation ]
                                │
                                ▼
   [ Step 2: Question Pool Sorting & Randomization Analysis ]
                                │
                                ▼
  [ Step 3: Linguistic Consistency Check & Character Matching ]
                                │
                                ▼
    [ Step 4: Formatting Verification & Page Alignment Checks ]
                                │
                                ▼
                   [ GENERATION LOOP COMPLETE ]
- Filter Evaluation: The platform validates your selected filters against the question database, ensuring the query matches your parameters perfectly.
- Question Pool Sorting: The system randomly pulls questions from the filtered pool, creating an objective test sheet without duplicating items.
- Linguistic Consistency Check: The rendering engine checks the chosen language settings, converting text strings into clean Urdu Nastaliq characters or standard English fonts.
- Formatting Verification: The layout assistant organizes the final document structure, checking question alignments and margins so the test sheet prints perfectly.
Once the countdown concludes, the status window closes automatically, and the platform displays your freshly generated examination document inside the interactive configuration preview area.
Typography Control and Page Adaptation Adjustments
The interactive preview area includes an advanced customization toolbar that lets you adjust structural layouts, change spacing options, and tweak font sizes before printing.
+-----------------------------------------------------------------------------+
|                        ADVANCED ADJUSTMENT TOOLBAR                          |
+-----------------------------------------------------------------------------+
|  English Font Size (px): [12]  │  Urdu Font Size (px):   [14]               |
|  Question Spacing (px):  [ 4]  │  Minimum Fit Scale Factor: [0.6]           |
+-----------------------------------------------------------------------------+
|     [ PREVIEW COPIES ]    │    [ FIT TO PRINT AREA ]    │   [ APPLY & PRINT ]  |
+-----------------------------------------------------------------------------+
Modifying Typographical Dimensions
- English Font Size Control: Use this option to adjust the text size for Western character elements, instructions, and standard alphanumeric labels.
- Urdu Font Size Control: Use this field to scale complex Arabic and Urdu scripts. Increasing this value makes intricate letterforms easier to read, while lowering it fits more text onto a single page.
Managing Layout Density and Question Spacing
The tool labeled Question Spacing regulates the vertical margins between individual question blocks. Adjusting this setting changes how questions are spaced across the page:
            Question Spacing Set to Low Value (e.g., -6px)
+---------------------------------------------------------------------+
| 1. Objective Question Item Label Text Rendered Here.                |
| (A) Choice One  (B) Choice Two  (C) Choice Three  (D) Choice Four   |
| 2. Next Sequential Question Item Label Stacked Directly Below.       |
| (A) Choice One  (B) Choice Two  (C) Choice Three  (D) Choice Four   |
+---------------------------------------------------------------------+
                                  vs
            Question Spacing Set to High Value (e.g., +8px)
+---------------------------------------------------------------------+
| 1. Objective Question Item Label Text Rendered Here.                |
| (A) Choice One  (B) Choice Two  (C) Choice Three  (D) Choice Four   |
|                                                                     |
|                                                                     |
| 2. Next Sequential Question Item Label Stacked Directly Below.       |
| (A) Choice One  (B) Choice Two  (C) Choice Three  (D) Choice Four   |
+---------------------------------------------------------------------+
- Decreasing Spacing: Entering a negative spacing value (such as -4 or -6) tightens the layout, packing question rows closer together. This is a great way to save paper by consolidating text blocks onto fewer sheets.
- Increasing Spacing: Setting a higher spacing value expands the vertical margins, leaving more room between questions. This adds blank space to the document, giving students plenty of room to write out answers directly on the test sheet.
Advanced Layout Formats and Verification Options
The platform features two distinct document layout styles tailored to different testing scenarios and organizational needs.
+--------------------------------------------------------------------+
|                      ACADEMY-ONLY FORMAT MODE                      |
+--------------------------------------------------------------------+
|  WRITE ACADEMY NAME                                                |
|  Class: Ninth Grade  │ Time Allowed: 2 Hours  │ Marks: 10          |
+--------------------------------------------------------------------+
                                   vs
+--------------------------------------------------------------------+
|                   SCHOOL-BASED ASSESSMENT FORMAT                   |
+--------------------------------------------------------------------+
|  MID-TERM SCHOOL-BASED ASSESSMENT (SBA) 2025-26                    |
|  GRADE-9 │ SUBJECT: COMPUTER SCIENCE │ TIME: 2 HOURS                |
|  Student Name: _________________ │ Roll Number: __________          |
+--------------------------------------------------------------------+
Academy-Only Format Mode
To use this streamlined layout, check the box labeled Academy Name Only in your configuration panel. This format uses a clean, compact header structure that features your custom academy name at the top of the page, followed by standard class, timing, and score tracking metrics. It is an ideal layout for private tutoring facilities, evening learning centers, and independent test prep clinics.
School-Based Assessment (SBA) Format Mode
Unchecking the Academy Name Only option switches the document to the formal School-Based Assessment (SBA) layout template. This layout expands the document header into an institutional administrative block, adding designated entry fields for student names, roll numbers, test dates, and specific classroom sections. It aligns perfectly with public school guidelines, official midterm testing protocols, and formal end-of-term evaluations.
Uploading Institutional Logos and Crests
To add custom branding to your examination sheets, locate the file selection field labeled Upload Academy Logo (Resized). Click Choose File to browse your local computer storage and upload an image file.
[ Click 'Choose File' Image Target Component ]
                       │
                       ▼
       [ Local Disk Navigation Interface ]
                       │
                       ▼
    Select Image Asset (e.g., Institutional Crest / Emblem)
                       │
                       ▼
     [ System Stores and Processes Image Upload ]
                       │
                       ▼
    [ Logo Rendered in Upper-Right Corner of Exam Header ]
Once uploaded, the platform’s image processor resizes your logo and places it securely in the upper-right corner of the exam header. This simple touch gives your printed evaluation materials a clean, polished, and professional appearance.
Final Output Compilation and Printing Process
Once you have customized your document layout, adjusted your typography settings, and added your institutional branding, follow these final steps to export and print your examination papers:
[ Verify Layout & Custom Formatting ]
                  │
                  ▼
         +------------------+
         |  PREVIEW COPIES  |  ◄── 1. Click to open layout view
         +------------------+
                  │
                  ▼
       +---------------------+
       |  FIT TO PRINT AREA  |  ◄── 2. Click to scale layout to A4
       +---------------------+
                  │
                  ▼
         +------------------+
         |  APPLY & PRINT   |  ◄── 3. Click to open system print dialog
         +------------------+
                  │
                  ▼
[ Select Printer / Save as PDF ] -> [ Final Physical/Digital Document Output ]
- Preview Copies: Click the Preview Copies button to generate an interactive mockup of your final document pages. This gives you a clear look at how your text blocks and margins will stack before sending the file to print.
- Fit to Print Area: Click the Fit to Print Area button to automatically optimize your document formatting for target paper sheets, like standard A4 paper sizes ($210 \times 297\text{ mm}$). This step safeguards your layout, preventing text from clipping at the page boundaries and protecting your exam content from trailing off into uneven extra pages.
- Apply & Print: Click the green action button labeled Apply & Print to open your operating system’s native printing window. From here, select your local connected printing hardware to create physical exam sheets instantly, or select Save as PDF to export a digital copy of your test paper for future distribution.
Systemic Randomization and Unique Exam Security Features
A major benefit of the ExamMasterAI software engine is its built-in randomization and security framework. The system adds a unique, tracking variable called the EMIS Code to the upper margin of every assessment sheet.
       Initial Evaluation Document Generation Run
+---------------------------------------------------------------+
| EMIS Identifier Value: EM-91178                               |
| Question 1: What is the primary function of read-only memory? |
+---------------------------------------------------------------+
                               │
                               ▼
        User Triggers Page Refresh / Re-compilation Command
                               │
                               ▼
     Subsequent Evaluation Document Generation Run
+---------------------------------------------------------------+
| EMIS Identifier Value: EM-91542                               |
| Question 1: Identify the non-volatile storage media component.|
+---------------------------------------------------------------+
The system randomizes this tracking token every time you refresh your browser or re-run the question generation engine. This background security feature shuffles your question arrays, reorganizes choice options, and swaps out data values instantly.
As a result, you can generate multiple completely distinct variations of the same exam with a single click. This structural security framework helps prevent cheating in large test environments, stops exam content leaks ahead of testing windows, and ensures that every student receives a unique, balanced evaluation sheet.
Comprehensive Troubleshooting and Best Practices Matrix
| Operational Issue Encountered | Root Cause Analysis | Corrective System Action Plan |
| Urdu script appears broken, disconnected, or displays in a basic system font instead of clean Nastaliq style. | The interface parameter values were clicked too quickly before the system could load external styling rules and font packages. | Refresh your browser window. Wait 2 to 5 seconds without clicking anything to let the loading scripts finish processing, then check the text display at the bottom of the screen before modifying filters. |
| The text layout overflows onto an extra sheet, leaving only one or two trailing lines on the final page. | The selected question spacing values or font sizes are too large for the total amount of text in your exam. | Open the formatting panel and reduce the Urdu Font Size or change your Question Spacing parameter to a negative value (such as -4 or -6). Click Fit to Print Area to pull the text back onto fewer sheets. |
| An error message pops up indicating that specific subject terms or search keywords might be misspelled. | The system detected a mismatch between your custom text input and the preset subject filters in the database. | Double-check that your spelling matches the standard catalog terms. Stick to the built-in dropdown choices for grade levels and courses to ensure smooth communication with the question database. |
| The institutional logo clips, appears blurry, or throws off the alignment of the exam header. | The uploaded image file uses an unsupported file format or its resolution exceeds the recommended size constraints. | Resize your image asset so it matches the platform’s standard logo size guidelines ($24 \times 24\text{ px}$ or $64 \times 64\text{ px}$). Save the file as a clean .png or .jpg image before re-uploading. |
Conclusion: Driving Modern Educational Efficiency
Transitioning from time-consuming manual document creation to an agile digital framework is a major step forward for modern schools and learning centers. Using automated tools like ExamMasterAI.com simplifies daily administrative routines, completely removing the stress of manual formatting, layout alignment, and multi-language typing. This innovative, cloud-based platform gives teachers a fast, reliable way to build professional, well-balanced tests tailored to their exact student needs—all within a matter of seconds.
Implementing these intelligent assessment systems helps schools establish consistent, high-quality evaluation standards across all grade levels and subject areas. By handling the heavy lifting of test creation, the platform frees up valuable hours for instructors, allowing them to shift their focus away from paperwork and spend more time where it matters most: delivering impactful instruction and supporting student success. Set up your free account today and transform your exam preparation workflow!
You may also like

Exam Master AI: جدید تعلیم اور الیکٹرانک لرننگ کا مستقبل